Tutorials
While you read this, we are working on the water cooling guide.
If you can’t wait please take a look at the very good "Optimum Tech" How-tos:
120mm AIO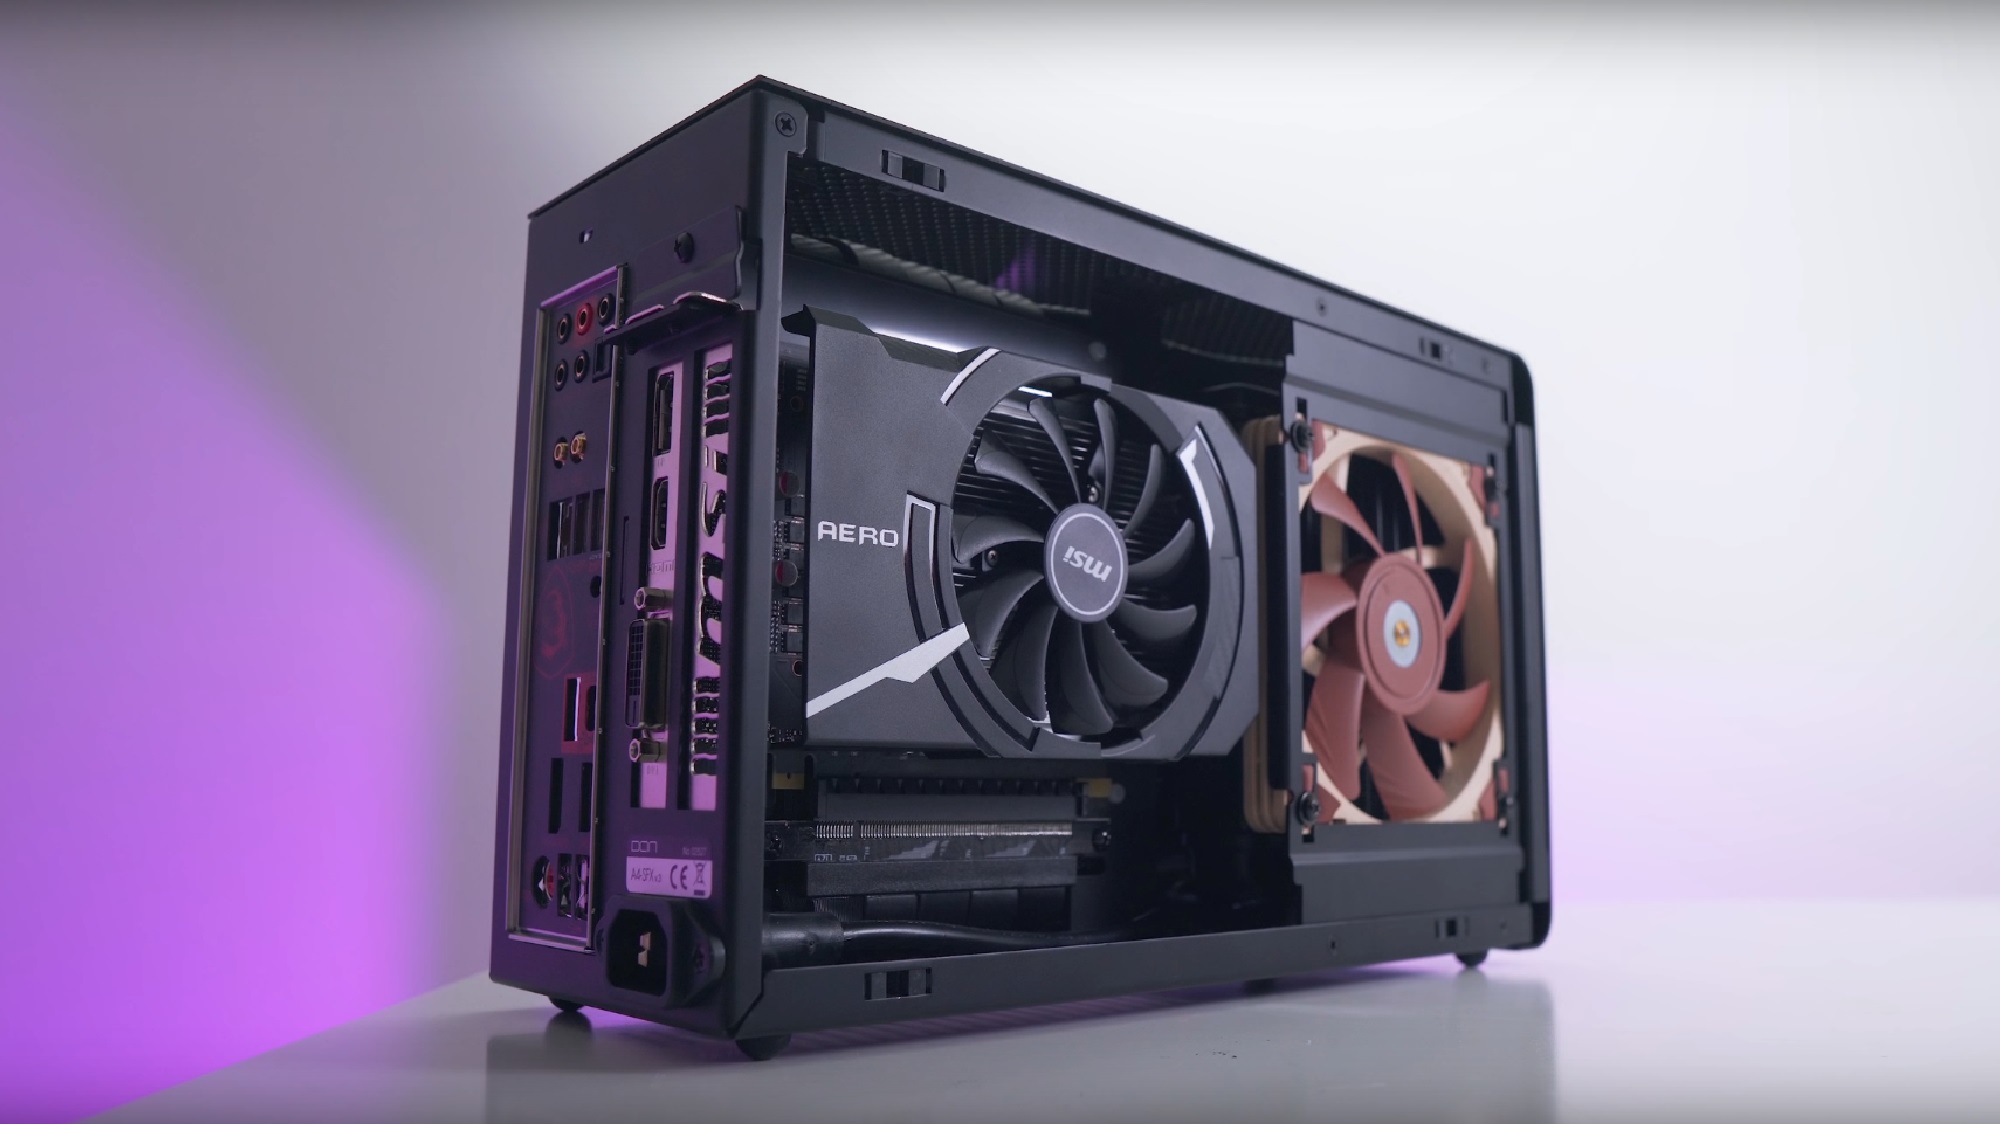
92mm AIO
All modifications are done on your own risk.
Helpful tools:
- Prime 95 v26.6 (none AVX) – stability test and extreme test for temperature
- Your favorite games - test for temperature
- CoreTemp - Monitor CPU power consumption, clocks and temperatures
Setup Long Duration Power Limit - (up to 30°C)
On modern Intel® based motherboards the CPU is allowed to run the max turbo clock on all cores. Therefor the CPU is able to source up to twice as much power. (9900K – stock 95W TDP vs real 210W TDP) If you setup “Long Duration Power Limit” in the UEFI to a value between 65 to 95W, the CPU will still reach the high turbo clock but as designed not on all cores. In games the average performance loss is 2% while the power and thermal advantage is huge.
*TDP = Thermal Designed Power
Undervolt the CPU - (up to 10°C)
Depending on your CPU you can setup an offset value between -0,05V to -0,1V. In combination with “Long Duration Power Limit” you can increase the turbo clock over all cores on Intel® CPUs, because with undervolting you lowered the CPU base power consumption. Keep in mind a high value can affect the stability of the system.
Remove the I/O Shield - (up to 5°C)
Remove the motherboard I/O shield so air can easier exhaust.
Using a fan duct/adapter - (up to 7°C)
If the CPU fan is not close to the side panel it will recycle hot air inside the case (e.g. L9i/L9a). You can buy the “Noctua NA-FD1” fan duct set or download the 3D print file above and upload it to an online 3D print service.
Delid your CPU - (up to 20°C)
On some Intel® CPUs the DIE is not soldered to the heatspreader instead the manufacturer uses thermal paste. By delidding the CPU and replace the thermal paste with liquid metal you will see a huge temperature drop. Keep in mind this modification is complicated and should be your last option. We do not recommend it.
A fan that is very close to the vent holes of the side panel creates air turbulences. These turbulences can be very noisy. The noise level depends on fan size/count, fan speed, fan blade design and fan distance to the panel.
The easiest way to reduce this issue is using micromesh dust filters. DEMCIFilter offers two custom sets for the A4-SFX. If you like to test this solution temporary, cut the tights of your girlfriend and span it over the fan.
Alternative solutions are, installing thinner fans or reducing the fan speed.
If you like to use a ASRock X99E-ITX or ASRock X299E-ITX inside the A4-SFX you have to use a water cooling solution or a server 1U heatsink. This guide will focus on air cooling for water cooling please read the “A4-SFX Water Cooling Guide”.
You need:
- Dynatron T318 2011/3 Narrow ILM heatsink (Asrock X99E-ITX)
- Dynatron R15 2066 Square ILM heatsink (Asrock X299E-ITX)
- 92x92x15 mm or 120 x 120 x15 mm fan (Noctua A9x14, A12x15 or Scythe Kaze Flex 120 Slim)
- Thin zip ties
Install the fan with thin zip ties on the heatsink. After that install the heatsink on the motherboard. Please refer to the “ How to improve cooling performance“ guide to optimize your temperatures.
The A4-SFXv4 has four pre-drilled holes on each side for mounting a custom acrylic/glass side panel. This will allow you to create a window panel by yourself.
- Download the “Window Kit Template” file in the download section.
- Open the DWG file with your preferred CAD software.
- Add cutouts/vent holes.
- Find a local/online acrylic cutting service (internet search engines can help).
- Many online cutting services offers an online CAD editor and let you preview different color and material options.
- Don’t forget to order/buy four M3 screws for each side panel.
AMD, Radeon and Ryzen are registered trademark of Advanced Micro Devices. EKL and Alpenföhn are registered trademark of EKL AG. Intel, Intel Core and Xeon are registered trademarks of Intel Corporation. NVIDIA, GeForce, GeForce RTX, GeForce GTX and Quadro is a registered trademark of NVIDIA Corporation. PCI Express is a registered trademark of PCI-SIG Corporation. Brand and product names mentioned are trademarks of their respective owners.
All images and descriptions are for illustrative purposes only. Visual representation of the products may not be perfectly accurate. All specifications are subject to change without notice. Although we endeavor to present the most precise and comprehensive information at the time of publication, a small number of items may contain typography or photography errors
Responsibility for the content of external links (to web pages of third parties) lies solely with the operators of the linked pages.